Crochet Placemats Pattern: Easy Round Table Tutorial
A handmade placemat can completely change the look of a dining table. If you are looking for an easy crochet placemats pattern, this beginner-friendly round design is a great place to start. It uses basic stitches, simple increases, and a clean decorative border.
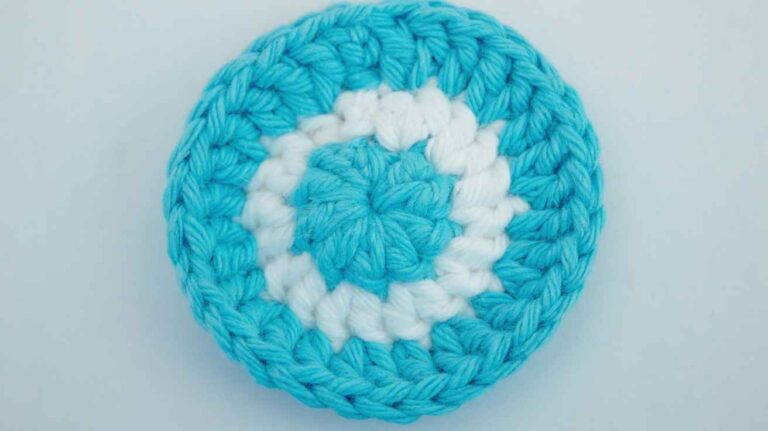
You can make the placemat in one color for a minimalist look or add contrasting rounds for a colorful farmhouse, boho, or modern table setting. The pattern can also be adjusted easily to make smaller mats, larger dinner placemats, or matching crochet coasters.
In this tutorial, I’ll show you what yarn and hook to choose, how to keep your circle flat, how to crochet the placemat step by step, and how to customize the finished size.

Why Make a Crochet Placemats Pattern?
A crochet placemat is more than a pretty table accessory. It is also a practical project for learning how to crochet in the round, control increases, maintain even tension, and create clean borders.
Round placemats are especially beginner-friendly because the basic shape comes from repeating a simple increase formula. Once you understand that formula, you can make the project smaller or larger without completely changing the design.
This crochet placemats pattern is designed around a simple circular base using double crochet stitches. A medium-size placemat will generally work well under a dinner plate, but you can stop earlier or continue with additional rounds depending on your table and plate size.
Materials for This Crochet Placemats Pattern
You do not need a large collection of supplies for this project.
| Material | Recommended choice |
|---|---|
| Yarn | Medium-weight cotton yarn |
| Crochet hook | 4.5–5 mm |
| Tapestry needle | For weaving in ends |
| Scissors | For trimming yarn |
| Stitch marker | Helpful for marking rounds |
| Measuring tape | For checking diameter |
Cotton is a particularly useful choice for table crochet because it creates a firm fabric and is commonly used for washable home décor projects. Several crochet placemat patterns also use cotton or linen-style yarn for this reason.
For hook selection, check the yarn label first. Hook sizing varies between yarns, and the Craft Yarn Council recommends relying on the metric millimeter measurement when comparing hook sizes.
What Yarn Weight Should You Use?
A medium or worsted-weight cotton yarn is a practical starting point.
The Craft Yarn Council classifies worsted, Afghan, and Aran yarns as category 4 medium yarn. Its general crochet hook range for this category is around 5.5–6.5 mm, although individual yarn labels can recommend different hooks depending on the desired fabric.
For a placemat, I prefer a slightly firmer fabric rather than a very loose one. If your stitches feel too tight, go up a hook size. If the finished fabric feels floppy or has large gaps, try a smaller hook.
Crochet Abbreviations
This pattern uses common U.S. crochet terminology.
- ch – chain
- dc – double crochet
- sc – single crochet
- sl st – slip stitch
- st – stitch
- rep – repeat
- inc – increase
- sk – skip
If you normally crochet using UK terminology, remember that U.S. double crochet and UK treble crochet are equivalent stitches.
How to Make This Crochet Placemats Pattern
Step 1: Make the Center Ring
Start with a magic ring.
Chain 3, then work 11 double crochet stitches into the center of the ring.
Pull the yarn tail gently to close the hole.
Join with a slip stitch to the top of the beginning chain.
You should have 12 stitches in your first round.
If you are uncomfortable making a magic ring, you can chain 4 and join the chain with a slip stitch to create a small ring. Then crochet the first round into the center.
Step 2: Increase the Circle
The key to a flat round crochet placemat is even increases.
For Round 2, chain 3 and work 2 double crochet stitches into each stitch around.
Join with a slip stitch.
You should now have 24 stitches.
Do not worry if your center looks small at this point. The circle will expand quickly as you add rounds.
Step 3: Continue the Increase Pattern
For Round 3, use this sequence:
1 dc in the next stitch, 2 dc in the next stitch. Repeat around.
You should have approximately 36 stitches.
For Round 4:
1 dc in each of the next 2 stitches, 2 dc in the next stitch. Repeat around.
You should have approximately 48 stitches.
Continue increasing in the same basic way.
The important idea is simple: each new round adds one more regular double crochet between increases.
For example:
- Round 2: 2 dc in every stitch
- Round 3: 1 dc, increase
- Round 4: 2 dc, increase
- Round 5: 3 dc, increase
- Round 6: 4 dc, increase
- Round 7: 5 dc, increase
This gradual increase keeps the circle expanding instead of turning into a bowl.
Step 4: Check That Your Placemat Is Lying Flat
Stop occasionally and place your work on a flat surface.
A properly increasing crochet circle should sit relatively flat.
If the placemat starts curling upward like a bowl, you probably need more increases.
If the outer edge becomes wavy or ruffled, you may have too many increases.
This is one of the most useful tricks for making a crochet placemats pattern successfully: watch the shape, not just the stitch count.
Different yarns, hooks, tension, and stitch heights can change how many increases your particular project needs.
The Craft Yarn Council also recommends making a gauge swatch rather than assuming yarns in the same weight category are automatically interchangeable.
Step 5: Crochet Until You Reach Your Desired Size
Continue adding rounds until the circle is approximately the size you want.
For a typical dinner placemat, around 12–14 inches across is a useful target. Some designs are smaller, while oversized decorative placemats can be larger.
A simple way to choose your size is to place your dinner plate in the center.
You want enough visible crochet around the plate to create a border without making the placemat so large that it crowds neighboring place settings.
Several existing round placemat designs use approximately this size range, while specific patterns may be designed smaller or larger.
Step 6: Add a Simple Border
Once the center reaches your desired diameter, you can finish with a simple single crochet border.
Chain 1.
Work 1 single crochet into each stitch around.
Join with a slip stitch to the first single crochet.
Fasten off and leave a yarn tail.
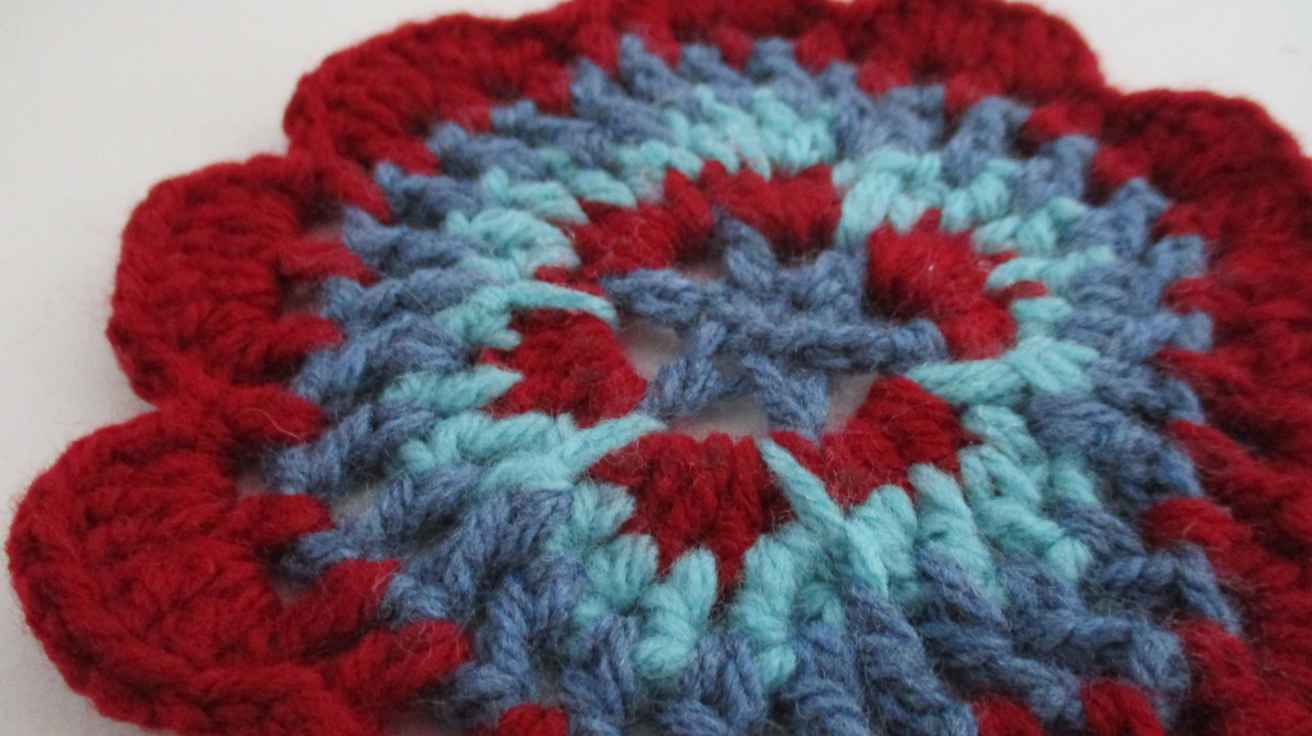
For a more decorative edge, you can create a scalloped border.
One simple option is:
Skip 1 stitch, work 5 double crochet stitches into the next stitch, skip 1 stitch, slip stitch into the next stitch. Repeat around.
This creates small shell-like scallops around the outside.

Step 7: Weave in the Ends
Thread the yarn tail onto a tapestry needle.
Weave the end back and forth through several stitches on the wrong side of the placemat. Trim the excess yarn carefully.
Do the same with the starting yarn tail.
Avoid simply cutting the ends close to the crochet fabric. Weaving them through several stitches gives the finished piece a more secure finish.
Step 8: Block the Placemat
Blocking is optional, but it can make a noticeable difference.
If your placemat looks slightly uneven, dampen it according to the yarn’s care instructions and lay it flat.
Gently shape the edges into a circle.
Allow it to dry completely before moving it.
If the finished piece already lies flat and has a good shape, you may not need to block it. Some crochet patterns specifically recommend blocking only when the finished piece has cupping or bunching.
How Many Rounds Should a Crochet Placemat Have?
There is no universal number of rounds because the final size depends on your yarn weight, hook size, stitch tension, and design.
Instead of stopping at a specific round number, measure the diameter as you work.
For example:
- 8–10 inches: smaller placemat or child-sized setting
- 10–12 inches: compact dinner setting
- 12–14 inches: common dinner placemat size
- 14+ inches: oversized decorative placemat
The best measurement is the one that works with your actual plate and table.
How Do You Keep a Crochet Circle Flat?
The easiest way to keep a crochet circle flat is to distribute increases evenly around each round. If there are too few increases, the project can curl upward. If there are too many, the outer edge can become wavy.
Your tension also matters.
If you crochet very tightly, the fabric may become stiff and curl. If you crochet loosely, the circle may become too soft or develop gaps.
This is why checking your project every few rounds is more useful than blindly following a fixed stitch count.
Can Beginners Make Crochet Placemats?
Yes. A simple round placemat is a good beginner crochet project because it combines basic stitches with repeated increases.
You only need to be comfortable with:
- Making a slip knot
- Making a magic ring
- Chain stitches
- Double crochet
- Single crochet
- Slip stitches
- Basic increases
- Weaving in yarn ends
If you are new to crochet, start with one placemat rather than immediately making a set of six. Once you understand the pattern, the remaining placemats will usually become much easier to make consistently.
How Can You Customize This Crochet Placemats Pattern?
One of the best things about making your own placemats is that you are not limited to one color or one border.
Try Two Colors
Use one neutral shade for the center and a contrasting color for the final few rounds.
For example:
- Cream + sage green
- Beige + terracotta
- White + navy
- Gray + mustard
- Natural + dusty pink
Make a Farmhouse Version
Choose cream, oatmeal, tan, or muted green cotton yarn.
Finish with a simple scalloped border for a soft farmhouse appearance.
Make a Modern Version
Use one solid color and a clean single crochet border.
Black, white, charcoal, beige, or muted earthy colors work particularly well for a simple modern table setting.
Make a Boho Version
Try warm neutrals, terracotta, olive, mustard, or dusty rose.
You can also experiment with a textured border or alternating colors.
A Useful Trick: Make the Placemat and Coaster Match
Here is an easy way to create a coordinated table set.
Stop your circular pattern after a few rounds to create a coaster. Then continue the same increase pattern for the larger placemat.
This gives you matching crochet coasters and placemats without having to learn two completely different designs.
Some existing crochet designers use this same idea by adapting a smaller circular coaster design into a larger placemat.
For a handmade gift, make four placemats and four matching coasters in the same colors.
That turns a simple crochet project into a complete dining-room set.
Common Problems When Crocheting Placemats
Why Is My Crochet Placemat Curling?
Your circle may need additional increases, or your tension may be too tight.
Try adding increases more evenly around the next round and check the project on a flat surface.
Why Is My Crochet Placemat Wavy?
A wavy edge often means there are too many increases.
Try reducing the number of increases in the next round or checking whether you accidentally added extra stitches.
Why Is My Placemat Not Round?
Check your stitch count at the end of each round.
Missing an increase can make one section of the circle tighter than the others.
Also check that you are joining each round consistently if your pattern uses joined rounds.
Can I Use Acrylic Yarn?
You can, but cotton is usually a practical choice for a placemat that will be used around food and washed regularly.
If you choose another fiber, check its care instructions and consider how the finished fabric handles washing, heat, moisture, and everyday use.
How to Wash Crochet Placemats
Always follow the care instructions for the specific yarn you use.
Do not assume that every cotton or cotton-blend yarn has identical washing instructions.
The Craft Yarn Council recommends paying attention to care symbols because they communicate washing and other care requirements across yarn and textile labels.
Before making a complete set, test-wash one finished placemat if possible. This gives you a chance to see whether the fabric changes size, shape, softness, or color before you finish the entire collection.
Can You Sell Crochet Placemats?
Absolutely. Handmade placemats can work well as gifts, home décor products, seasonal collections, or customized table-setting pieces.
If you plan to sell them, think beyond the basic pattern.
Offer coordinated color collections, sets of two or four, matching coasters, personalized color combinations, or seasonal designs.
The real opportunity is often the set, rather than selling one basic placemat by itself.
FAQ
What is the best yarn for crochet placemats?
Cotton yarn is a popular choice for crochet placemats because it produces a sturdy fabric and is commonly used for washable home décor projects. Medium-weight cotton is a convenient starting point, but always check the yarn label for its recommended hook and care instructions.
How big should a crochet placemat be?
A dinner placemat is commonly around 12–14 inches in diameter, although the ideal size depends on your plate, table, and preferred design. Measure your actual dinner plate and leave enough visible space around it for the look you want.
What crochet stitch is best for placemats?
Single crochet and double crochet are both useful choices. Single crochet creates a denser fabric, while double crochet works up faster and creates a slightly more open texture. This pattern uses double crochet for the main circular section and single crochet for a simple border.
Why does my crochet placemat curl?
A curling circular placemat usually needs more evenly distributed increases, or the stitches may be too tight. Check your stitch count and lay the project flat every few rounds. Adjusting the hook size can also help.
How many crochet placemats should I make for a table?
Four placemats are useful for a small table, while six is a common choice for a larger dining table. If you are making them as a gift or selling them, sets of four can be particularly convenient because they are easy to package and coordinate.