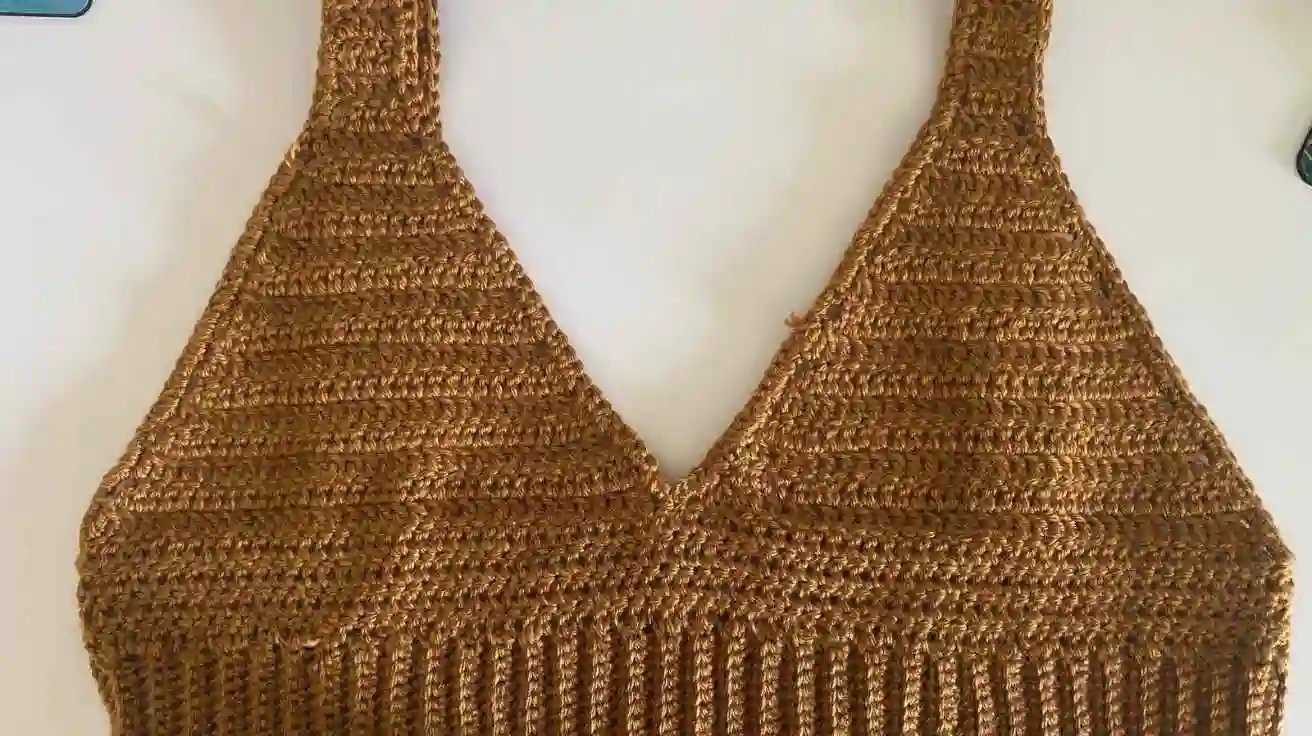
Crochet Crop Tops Pattern: Easy Step-by-Step Guide for Beginners
A crochet crop tops pattern can help you turn a few simple supplies into a handmade piece that matches your style, size, and favorite colors.
Crochet crop tops are lightweight, versatile, and fun to wear during warm weather. You can create a simple beginner design with basic stitches or experiment with lace patterns, colorful stripes, and decorative edges as your skills improve.
In this guide, you’ll learn how to choose yarn and hooks, follow a beginner-friendly crochet crop top pattern, shape the front panel, assemble the top, and adjust the fit. You’ll also discover useful sizing tips, styling ideas, and common mistakes to avoid.
Whether you’re making your first crochet garment or adding another handmade piece to your wardrobe, this guide will help you get started with confidence.
What Is a Crochet Crop Tops Pattern?
A crochet crop tops pattern is a set of instructions that explains how to make a cropped top using yarn, a crochet hook, and specific stitches. Most patterns include a materials list, stitch abbreviations, measurements, and directions for shaping and assembling the garment.
Some patterns use two simple rectangles, while others feature shaped cups, adjustable straps, ribbed bands, or decorative lace. The best design for a beginner is one that uses familiar stitches and allows you to check the fit as you work.
A simple crochet crop top can be customized in several ways:
- Length: Make it shorter for a classic crop or longer for more coverage.
- Fit: Add or remove stitches to suit your measurements.
- Texture: Choose solid stitches, mesh, or open lace.
- Color: Use a single shade, stripes, or a multicolor yarn.
- Straps: Add thin ties, wider straps, or adjustable shoulder straps.
The main advantage of making your own top is control. You can change the shape, coverage, and color instead of settling for a ready-made design.
Materials You’ll Need for a Crochet Crop Tops Pattern
Before starting your crochet crop tops pattern, gather the right materials. Choosing suitable yarn and checking your gauge will make the finished top more comfortable and help it hold its shape.

| Material | Beginner-friendly recommendation | Purpose |
|---|---|---|
| Yarn | Cotton or a cotton blend | Creates a breathable fabric |
| Crochet hook | Often 3.5–5 mm, depending on yarn | Forms the stitches |
| Scissors | Small, sharp scissors | Cuts yarn ends |
| Measuring tape | Flexible sewing tape | Checks body and garment measurements |
| Stitch markers | Locking crochet markers | Marks edges and important stitches |
| Yarn needle | Blunt-tipped needle | Weaves in loose ends |
Which Yarn Is Best for Crochet Crop Tops?
Cotton yarn is a popular choice because it feels breathable and works well for summer clothing. Cotton blends may offer a softer feel or different drape, depending on their fiber content.
Choose yarn that feels comfortable against your skin. Avoid very heavy yarn if you want a lightweight top, and check the yarn label for the recommended hook size and care instructions.
How Much Yarn Do You Need?
The amount depends on your size, top length, stitch pattern, yarn weight, and whether you include decorative details.
As a rough planning estimate, a small, simple adult crop top might use around 150–250 grams of yarn. Larger sizes, dense stitches, long tops, and textured patterns may need more. Check your specific pattern and buy enough yarn from the same dye lot when possible.
Choosing the Right Crochet Hook
A hook that is too small can make your fabric stiff. A hook that is too large can create loose stitches and unwanted gaps.
Make a small gauge swatch before starting. If your stitches are too tight, try a larger hook; if they’re too loose, try a smaller one.
4. Crochet Crop Tops Pattern: Step-by-Step Instructions
This beginner-friendly design uses a simple front panel, a matching back panel, and shoulder straps. It is easier to adjust than a complicated fitted design because you can measure the panels against your body before joining them.
The instructions below describe a basic, customizable crop top rather than a tested, size-graded commercial pattern. Your stitch count will depend on your yarn, hook, gauge, and measurements.

Step 1: Take Your Measurements
Measure your bust, desired top length, and shoulder-to-top distance. Decide how much coverage you want and whether you prefer a close fit or a relaxed fit.
Write down your measurements before you begin. This gives you a clear target instead of relying on a generic stitch count that may not suit your body.
For a two-panel design, plan the width of each panel according to the finished garment circumference and the amount of ease you want. Remember that crochet fabric can stretch, so your gauge swatch matters.
Step 2: Make a Foundation Chain

Create a slip knot and place it on your hook. Yarn over and pull the yarn through the loop to form chain stitches.
Continue until the chain reaches your planned panel width. Keep the loops even without pulling them too tightly.
Beginner tip: If your foundation chain is much tighter than the rows above it, the bottom edge may curl or pull inward. Try a slightly larger hook for the foundation chain if needed.
Step 3: Crochet the First Row

Insert your hook into the appropriate chain, yarn over, and pull up a loop. Yarn over again and pull through both loops to complete a single crochet stitch.
Work across the chain, following the stitch pattern you have chosen. At the end of the row, chain the turning stitch required by your pattern and turn your work.
Count your stitches regularly. Keeping the same stitch count from row to row helps you create straight edges and a more predictable fit.
Step 4: Build the Front and Back Panels

Continue crocheting rows until the panel reaches your planned length. You can use single crochet for a firm fabric or double crochet for a more open, flexible texture.
For a basic two-panel top, make a second panel that matches the first. Check both pieces against your measurements before joining them.
If you want a shorter crop top, stop earlier. For more coverage, add rows before finishing the edges.
Step 5: Shape the Bust Area

If your chosen design includes shaped cups, follow a cup-specific pattern rather than treating the panels as plain rectangles. Cup shaping may use increases, decreases, or short rows to create a curved outline.
For a simpler straight-panel design, you can skip separate cups and use a comfortable, supportive lining or an appropriate underlayer. A basic crochet fabric may be too open or too stretchy to provide reliable support on its own.
Try the pieces on or compare them with a garment that fits well before moving forward.
Step 6: Join the Panels

Place the front and back panels together with the sides aligned. Use a yarn needle or crochet hook to join the side edges, leaving the armholes open.
Check the seam as you work. A tight seam can make the top uncomfortable, while a loose seam may stretch out during wear.
Try the garment on before closing the final section. Adjust the side seams if you need more room or a closer fit.
Step 7: Add the Shoulder Straps

Make two straps using chains and single crochet stitches, or use a strap style specified in your pattern. Attach each strap securely to the front and back.
Place the straps where they feel comfortable and provide the neckline shape you want. Adjustable tie straps can make fitting easier, especially if you are making the top as a gift or selling it in a small handmade collection.
Reinforce the attachment points with several secure stitches. These areas experience extra tension during wear.
Step 8: Finish the Edges and Weave in the Ends

Add a border around the neckline, armholes, and hem if your design needs one. Single crochet can create a neat edge, while shell stitches can give the top a decorative finish.
Cut the yarn, leaving enough length to secure each end. Use a yarn needle to weave the tails through several stitches without creating bulky knots.
Wash and dry the top according to the yarn label. Once it is dry, check the seams, straps, and overall fit before wearing it.
5. Crochet Crop Top Patterns for Different Skill Levels
Not every crochet crop tops pattern needs to be complicated. Start with a design that matches your skills, then add detail as you become more confident.

Beginner: Simple two-panel crop top
Use basic stitches and rectangular panels. This style is ideal for learning stitch consistency, measuring, and joining seams.

Intermediate: Lace crochet crop top
Try mesh stitches, shells, or openwork patterns. These create a lighter look but require attention to stitch counts and spacing.

Creative challenge: Striped or tie-strap top
Combine colors, experiment with adjustable straps, or add decorative borders. Plan yarn changes and secure every loose end neatly.
6. How to Customize the Fit of Your Crochet Crop Top
The best crochet crop tops pattern is one you can adapt to your own measurements. Small changes to width, length, and strap placement can make a big difference in comfort.
| Feature | How to adjust it | What to check |
|---|---|---|
| Width | Change the foundation chain or panel width | Finished circumference |
| Length | Add or remove rows | Coverage and hem position |
| Neckline | Change cup shaping or strap placement | Comfort and desired shape |
| Straps | Adjust their length or use ties | Shoulder comfort and stability |
| Hem | Add ribbing, shells, or a simple border | Stretch and edge neatness |
A Useful Fit-Test Trick
Before making both panels, crochet a swatch in your chosen stitch and measure it after washing and drying. For example, if 20 stitches measure 10 cm, your gauge is 2 stitches per centimetre.
If your target panel width is 40 cm, you would need approximately 80 stitches at that gauge, before allowing for any pattern repeats or edge stitches. This calculation is a starting point, not a guarantee; check the fabric against your measurements as you work.
This simple step can save time and yarn because you can correct the hook size or stitch count before making the entire top.
7. Common Crochet Crop Top Mistakes to Avoid
Even an easy crochet crop tops pattern can go wrong if you skip the measuring and finishing stages. Watch for these common problems:
- Skipping the gauge swatch: Your finished top may be larger or smaller than expected.
- Using unsuitable yarn: Very heavy or stiff yarn can make a summer top uncomfortable.
- Forgetting stitch counts: Extra or missing stitches can cause uneven panels.
- Making straps too weak: Reinforce the attachment points and test them gently.
- Ignoring fabric transparency: Open stitches may need a lining or underlayer.
- Skipping the wash test: Some yarns relax, shrink, or change shape after washing.
One more practical tip: record your final stitch count, row count, hook size, and measurements. If you make another top later, these notes provide a useful starting point for repeating or adjusting the design.
Read – Common Crochet Mistakes For Beginners
8. How to Style Your Handmade Crochet Crop Top


A handmade crochet crop top can work with casual, beach-inspired, or dressier outfits. The best styling choices depend on the top’s color, stitch pattern, and level of coverage.
- Casual summer look: Pair a solid crochet top with denim shorts and sandals.
- Beach outfit: Wear an openwork top over a swimsuit with a loose skirt.
- Bohemian style: Combine a lace crochet top with a flowing maxi skirt and simple accessories.
- Everyday outfit: Layer a more covered crochet top over a fitted camisole and wear it with high-waisted trousers.
Neutral shades such as cream, beige, and white create a timeless look. Lavender, coral, and turquoise add color, while stripes can help you use leftover yarn.
For comfort, consider the weather, fabric weight, and amount of coverage. A lightweight cotton blend is often a good starting point for warm-weather clothing.
9. Frequently Asked Questions About Crochet Crop Tops Patterns
Is a crochet crop top easy for beginners?
Yes. A simple two-panel crochet crop top can be beginner-friendly if it uses basic stitches and straightforward assembly. Start with single crochet or double crochet, check your measurements, and choose a pattern that explains its abbreviations.
How long does it take to crochet a crop top?
A basic crop top may take around 6–10 hours for someone familiar with the stitches, while a beginner may need several sessions or more. The time depends on the design, yarn weight, stitch complexity, size, and experience.
What is the best yarn for a crochet crop top?
Cotton and cotton-blend yarns are popular choices for summer crop tops because they can create breathable, comfortable fabric. Check the yarn label, recommended hook size, and care instructions before starting.
Can I adjust a crochet crop tops pattern to my size?
Yes. You can change the panel width, top length, strap length, and neckline shape. Make a gauge swatch first, calculate your stitch count, and measure the garment as you work to help achieve a comfortable fit.
How do I stop my crochet crop top from stretching?
Choose suitable yarn, check your gauge, and avoid making the fabric too loose. Reinforce straps and seams, and wash the finished top according to the yarn label. If the design needs more stability, consider a firmer stitch pattern or a suitable lining.