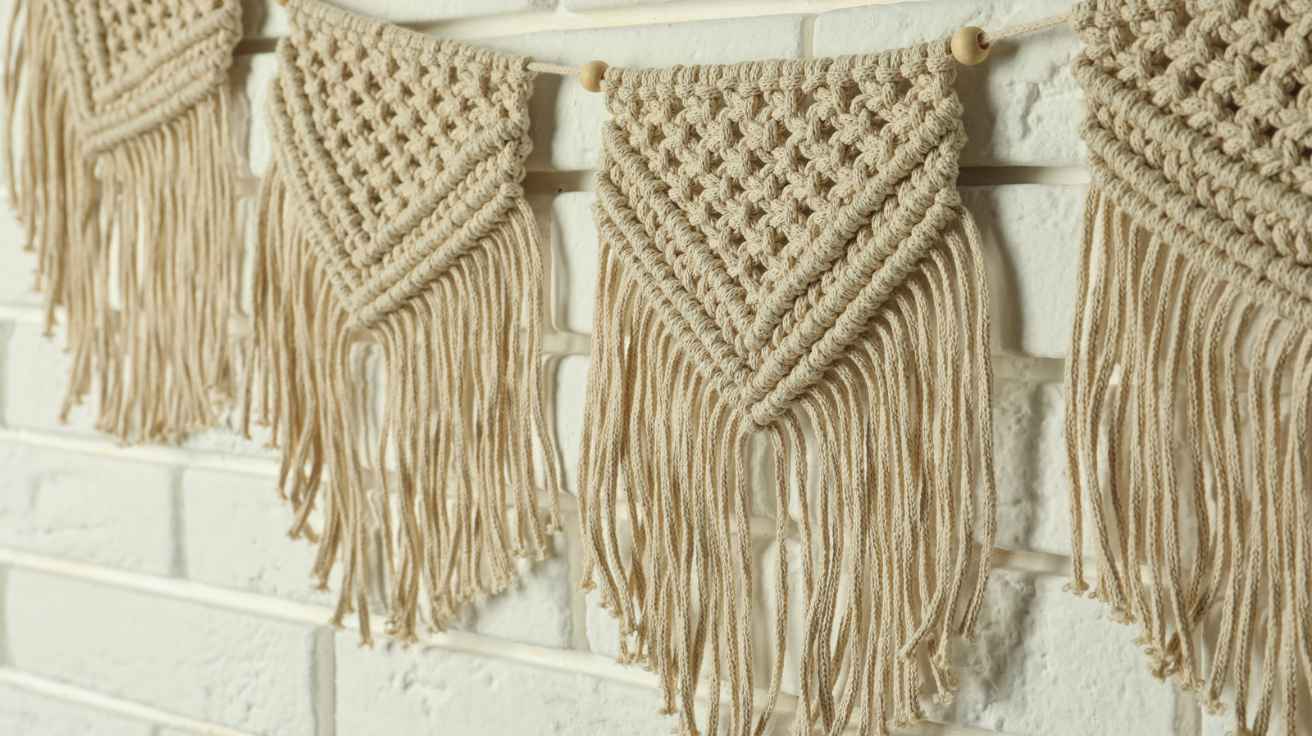
Crochet Wall Hanging: Easy DIY Pattern for Beginners
Have you ever looked at an empty wall in your home and wished you could decorate it with something beautiful, affordable, and personal? A crochet wall hanging is a wonderful way to turn simple yarn into handmade wall art that adds warmth, texture, and character to any room.
The best part is that you don’t need advanced crochet skills or expensive supplies to get started. With a crochet hook, a few skeins of yarn, and a wooden dowel, you can create a beautiful decoration that matches your personal style.
In this beginner-friendly guide, you’ll learn how to make a crochet wall hanging step by step. We’ll cover the materials you need, how to crochet the main panel, how to add decorative fringe, and how to attach your finished piece to a wooden dowel. You’ll also discover color combinations, styling tips, and creative ways to customize your design.
Whether you’re decorating a bedroom, living room, nursery, or craft room, this easy crochet project can help you transform an ordinary wall into something special.
What Is a Crochet Wall Hanging?
A crochet wall hanging is a handmade textile decoration created with yarn and a crochet hook. It usually features a crocheted panel attached to a wooden dowel, branch, or decorative rod, allowing you to display it on a wall.
These decorations come in many shapes, sizes, and styles. Some feature simple rectangular panels, while others include geometric patterns, flowers, leaves, textured stitches, or colorful fringe.
A crochet wall hanging is especially popular in boho, farmhouse, rustic, Scandinavian, and minimalist interiors because it introduces soft textures and natural materials.
You can make a small wall decoration for a reading corner or create a larger statement piece above a bed or sofa.
Another advantage is that you can customize almost every detail, including the yarn type, color palette, stitch pattern, width, length, and finishing touches.
Materials Needed to Make a Crochet Wall Hanging
Before beginning your crochet wall hanging, gather the supplies below. Most are inexpensive, and you might already have some in your crochet basket.
| Material | Recommended choice | Purpose |
|---|---|---|
| Yarn | Medium-weight cotton or acrylic yarn | Creates the main panel |
| Crochet hook | 5 mm hook | Helps form the stitches |
| Wooden dowel | 12–14 inches long | Supports the finished piece |
| Yarn needle | Large-eye tapestry needle | Weaves in loose ends |
| Scissors | Sharp craft scissors | Cuts yarn and fringe |
| Measuring tape | Flexible measuring tape | Measures the panel |
| Hanging cord | Matching yarn or cotton cord | Allows you to hang the decoration |
For a beginner project, choose medium-weight yarn because it is comfortable to handle and produces clearly defined stitches.
Cotton yarn is an excellent choice when you want a structured panel with visible stitch definition. Acrylic yarn is another option if you prefer a wide selection of colors.
Choose a smooth wooden dowel that is slightly wider than your finished crochet panel. You can also use a clean, dry branch for a more natural, rustic appearance.
Beginner tip: Use the same yarn weight throughout your first project. Mixing different yarn thicknesses can make your stitches uneven and cause the finished panel to lose its shape.
Choose Your Crochet Wall Hanging Design
Before picking up your hook, decide what kind of wall decoration you want to create.
Here are five popular crochet wall hanging styles to consider.
1. Minimalist Crochet Wall Hanging
A minimalist design uses simple stitches, neutral colors, and clean lines. Cream, white, beige, and soft gray work especially well.
This style suits Scandinavian interiors, modern bedrooms, and spaces where you want a subtle handmade accent.
2. Boho Crochet Wall Hanging

Boho crochet wall hangings often feature textured stitches, long fringe, earthy colors, and natural wooden rods.
Try combining cream, terracotta, mustard, sage green, or dusty pink for a warm, relaxed appearance.
3. Geometric Crochet Wall Hanging
Geometric designs use shapes such as diamonds, triangles, stripes, and zigzags.
You can create simple geometric patterns by changing yarn colors between rows. This approach is ideal for crocheters who want to experiment with colorwork without learning complicated stitches.
4. Floral Crochet Wall Hanging
Floral wall hangings feature crocheted flowers, leaves, or botanical motifs. You can crochet small flowers separately and sew them onto a finished panel.
Soft pink flowers against a cream background create a delicate look, while green leaves and neutral yarn suit a natural, botanical theme.
5. Textured Crochet Wall Hanging
Textured designs use stitches such as bobbles, puff stitches, and front-post stitches to create raised patterns.
They can make a simple, single-color panel look interesting without requiring several yarn shades.
For your first project, I recommend a simple rectangular crochet wall hanging with a textured body and fringe. It’s easy to customize, requires only basic stitches, and provides plenty of opportunities to practice your technique.
How to Make a Crochet Wall Hanging Step by Step
This beginner-friendly pattern creates a rectangular wall hanging with a solid crochet panel, decorative fringe, and a wooden dowel.
The measurements are flexible, so you can adjust the width and length to suit your wall.
Project details
- Skill level: Beginner
- Finished panel: Approximately 10 inches wide × 12 inches long, excluding fringe
- Estimated time: 3–5 hours
- Yarn: Approximately 150–250 yards of medium-weight yarn
- Hook: 5 mm crochet hook
- Main stitches: Chain and single crochet
- Construction: Flat panel worked in rows
The yarn amount and finished measurements will vary depending on your tension and yarn choice.
Step 1: Prepare Your Yarn and Crochet Hook

Start by selecting your yarn colors and preparing your workspace.
For a classic design, use one main color for the panel and a second color for the fringe. You can also use a single color for a minimalist finish.
Place your yarn, hook, scissors, measuring tape, and yarn needle within easy reach.
Check the yarn label for its recommended hook size. Although this pattern suggests a 5 mm hook, you can adjust it if your stitches are too tight or too loose.
What to do:
- Choose your main yarn color.
- Make sure your yarn is free from knots.
- Select a crochet hook suitable for the yarn.
- Prepare a wooden dowel that is slightly wider than your intended panel.
- Practice a few chain and single crochet stitches before starting.
If you are new to crochet, learn how to make a slip knot and foundation chain first. These basic techniques will help you begin your project confidently.
Step 2: Create the Foundation Chain
The foundation chain determines the width of your crochet wall hanging.
For this example, make a foundation chain of 31 stitches. This should produce a small rectangular panel with approximately 30 single crochet stitches across, although the exact width depends on your yarn and tension.
Instructions:
- Make a slip knot and place it on your crochet hook.
- Yarn over by wrapping the yarn around your hook.
- Pull the yarn through the loop on your hook.
- Repeat until you have 31 chains.
- Check that your chain is not too tight.
Keep your chains relaxed and reasonably even. If your foundation chain is too tight, the bottom edge of your crochet wall hanging may curl or pull inward.
If you want a wider design, add more chains. Just remember that a wider foundation chain will require more yarn.
Step 3: Crochet the First Row


Now you’ll begin creating the main panel.
This pattern uses single crochet stitches because they produce a firm fabric that holds its shape well.
Instructions:
- Insert your hook into the second chain from the hook.
- Yarn over and pull up a loop. You should now have two loops on your hook.
- Yarn over again and pull through both loops.
- Repeat the single crochet stitch across the foundation chain.
- At the end of the row, chain one and turn your work.
You should have approximately 30 single crochet stitches in your first row.
Count your stitches before continuing. Maintaining the same stitch count in every row helps keep the sides straight.
Step 4: Build the Main Crochet Panel
Continue crocheting rows of single crochet until the panel reaches approximately 12 inches in length.
For each row:
- Chain one and turn your work.
- Insert your hook into the first stitch.
- Complete one single crochet stitch.
- Continue working one single crochet into each stitch across the row.
- Count your stitches before starting the next row.
Repeat these steps until your panel reaches the desired length.
You can use a measuring tape to check your progress every few rows. Avoid stretching the fabric while measuring, as this can give you an inaccurate result.
For a more decorative design, try alternating solid rows with simple openwork rows.
To create an openwork row, you can alternate double crochet stitches with chain spaces. However, keep the single crochet pattern for your first project if you prefer a simple, sturdy panel.
A useful design tip: The texture of your crochet wall hanging becomes more noticeable when the stitches are even. Focus on consistent tension rather than trying to crochet quickly.
Step 5: Finish the Panel and Weave in Loose Ends
Once the panel reaches your desired length, finish the final stitch and fasten off your yarn.
Cut the working yarn, leaving a tail of approximately 6 inches.
Pull the tail through the final loop and gently tighten it.
Thread the tail through your yarn needle and weave it through several stitches on the back of the panel. Change direction once before trimming the remaining yarn.
Repeat this process for any loose ends.
Lay the finished panel on a flat surface and check its shape. If the edges curl or the panel looks uneven, blocking can help improve its appearance.
For cotton or acrylic yarn, check the yarn label before choosing a blocking method. Wet blocking or gentle steam blocking may be suitable for some yarns, but heat can damage certain fibers.
Allow the panel to dry completely if you use a wet-blocking method.
Step 6: Attach the Crochet Panel to a Wooden Dowel

The wooden dowel gives your crochet wall hanging support and makes it easy to display.
You can attach the panel using a tapestry needle and matching yarn.
Instructions:
- Place the wooden dowel horizontally above the panel.
- Center the panel beneath the dowel.
- Cut a length of yarn approximately three times the width of the panel.
- Thread the yarn through your tapestry needle.
- Stitch through the top edge of the crochet panel and loop the yarn around the dowel.
- Repeat across the entire top edge.
- Secure the yarn and weave in the remaining end.
Keep the stitches evenly spaced so the panel hangs straight.
You can also crochet directly around the dowel when making the first row of a wall hanging. However, attaching a completed panel with a needle is often easier for beginners because it allows you to adjust the panel’s position before securing it.
Make sure the dowel is smooth and free from splinters that could catch the yarn.
Step 7: Add Decorative Fringe

Fringe is a simple way to give your crochet wall hanging a relaxed, boho-inspired appearance.
You can use the same yarn as your panel or choose a contrasting color.
Instructions:
- Cut several lengths of yarn, each approximately 10–12 inches long.
- Group two or three strands together.
- Fold each group in half.
- Insert your crochet hook through a stitch along the bottom edge.
- Pull the folded loop through the stitch.
- Pass the loose ends through the loop.
- Pull gently to secure the fringe.
- Repeat across the bottom edge.
Add fringe to every stitch for a fuller look, or leave small gaps for a lighter finish.
Once you have attached the fringe, use scissors to trim the ends evenly. You can create a straight edge, a pointed V-shape, or a gentle curved outline.
Takeaway: Before attaching all the fringe, add three or four groups and step back to look at the panel. This helps you decide how much fringe you need without making the bottom too heavy.
Step 8: Add a Hanging Cord and Display Your Work
Your crochet wall hanging is almost finished!
Cut a length of strong yarn or cotton cord, approximately 16–20 inches long, depending on how much space you want between the dowel and the hanging point.
Tie one end securely around each end of the dowel.
Check that both sides are even and that the knot cannot easily slip.
Your finished wall hanging is now ready to display.
Choose a suitable wall hook or mounting method based on the weight of the decoration and the type of wall. For heavier pieces, use hardware rated for the load and appropriate for the wall material.
Hang the piece away from areas where it could be pulled, snagged, or exposed to moisture.
How to Customize Your Crochet Wall Hanging
Once you understand the basic pattern, you can experiment with different colors, stitches, and decorative details.
Here are some ideas to make your project unique.
Experiment With Color Combinations
Your color palette can completely change the appearance of your crochet wall hanging.
Try these combinations:
| Style | Suggested colors | Best suited for |
|---|---|---|
| Neutral boho | Cream, beige, and tan | Living rooms and bedrooms |
| Earthy farmhouse | Rust, brown, and ivory | Rustic interiors |
| Modern minimalist | White, gray, and black | Contemporary rooms |
| Soft and romantic | Blush pink, cream, and dusty rose | Bedrooms and nurseries |
| Botanical | Sage green, olive, and cream | Nature-inspired spaces |
| Bright and playful | Mustard, coral, and turquoise | Craft rooms and creative spaces |
If your room already contains patterned cushions, curtains, or rugs, consider choosing a yarn color that appears in one of those items. This creates a coordinated look without requiring an exact color match.
Add Crochet Flowers or Leaves
Small crochet flowers can turn a simple rectangular panel into decorative botanical wall art.
Make a few flowers in different sizes and attach them to the front of the panel using a yarn needle.
You can also crochet small leaves in shades of green and arrange them along one side.
Keep the decorations lightweight so the panel does not sag.
Try Different Crochet Stitches
Changing the stitch pattern is another way to create a more distinctive design.
Consider these options:
- Half double crochet: Creates a slightly taller, textured fabric.
- Double crochet: Produces a taller, more open fabric.
- Bobble stitch: Adds raised, rounded details.
- Puff stitch: Creates soft, raised texture.
- Front-post stitches: Produce raised lines and geometric texture.
Practice unfamiliar stitches on a small swatch before incorporating them into your wall hanging.
This lets you see how the fabric behaves and estimate how much yarn you’ll need.
Common Mistakes to Avoid
Even a simple crochet wall hanging can look uneven if you overlook a few details.
Watch out for these common problems.
1. Uneven edges: Missing the first or last stitch in a row can make the panel narrower as you work. Count your stitches regularly.
2. Tight foundation chains: A tight starting chain can pull the bottom edge inward. Use a relaxed tension or a slightly larger hook for the foundation chain.
3. Too much fringe: Thick fringe can make a small panel look crowded and may cause the bottom to hang unevenly. Add fringe gradually.
4. A crooked hanging rod: If the panel is not centered on the dowel, it may tilt when displayed. Measure the position before securing the yarn.
5. Poor color choices: Too many contrasting colors can make a small design look busy. Start with two or three shades and add more only if the design needs them.
6. Loose finishing ends: Unsecured yarn ends may work free over time. Weave them through several stitches and change direction before trimming.
Taking a little extra time during finishing can make a noticeable difference in the final result.
How to Style a Crochet Wall Hanging in Your Home
A handmade crochet wall hanging can complement many rooms when you choose the right size, colors, and placement.
Living Room
Hang a medium or large piece above a console table, reading chair, or small sideboard.
Neutral yarn and natural wood work well with wooden furniture, woven baskets, and soft furnishings.
Bedroom
Place a lightweight wall hanging above a bedside table or on a wall beside the bed.
Cream, blush, sage, and muted brown can create a soft, coordinated appearance.
Avoid placing the piece where it could become tangled in bedding or interfere with lighting fixtures.
Nursery
Choose soft colors and simple shapes for a gentle decorative accent.
If you are decorating a baby’s room, secure the wall hanging firmly and place it out of reach of children. Keep cords and hanging loops away from cribs and sleeping areas.
Craft Room
A colorful crochet wall hanging can make your creative space feel more personal.
You could even create a small collection featuring different stitches, yarn colors, or geometric shapes.
For a balanced display, leave enough empty wall space around each piece so the texture remains visible.
FAQ: Crochet Wall Hanging
1. Is a crochet wall hanging easy for beginners?
Yes, a simple crochet wall hanging is a beginner-friendly project. You mainly need to know how to make a foundation chain and single crochet stitches. Once you finish the panel, you can attach it to a wooden dowel, add fringe, and create a hanging cord.
2. What yarn is best for a crochet wall hanging?
Cotton and acrylic yarn are both suitable for crochet wall hangings. Cotton creates a structured fabric with clear stitch definition, while acrylic offers a wide range of colors. Medium-weight yarn is a practical starting point because it is easy to handle and works well with basic crochet stitches.
3. How long does it take to crochet a wall hanging?
A small, simple crochet wall hanging may take approximately three to five hours, depending on your skill level, stitch pattern, and finished size. More detailed designs with flowers, colorwork, or textured stitches can take longer.
4. How do you hang a crochet wall hanging without damaging the yarn?
The easiest method is to attach the top edge to a smooth wooden dowel using matching yarn and a tapestry needle. Add a hanging cord to the ends of the dowel and use a suitable wall hook. Avoid pulling the cord too tightly against the crochet fabric, as this can distort the top edge.
5. Can you wash a crochet wall hanging?
You may be able to wash a crochet wall hanging, but the best method depends on the yarn fiber and any attached decorations. Check the yarn care label first. Remove the wooden dowel before cleaning, if possible, and avoid soaking materials that may bleed color or lose their shape. Make sure the piece dries completely before displaying it again.