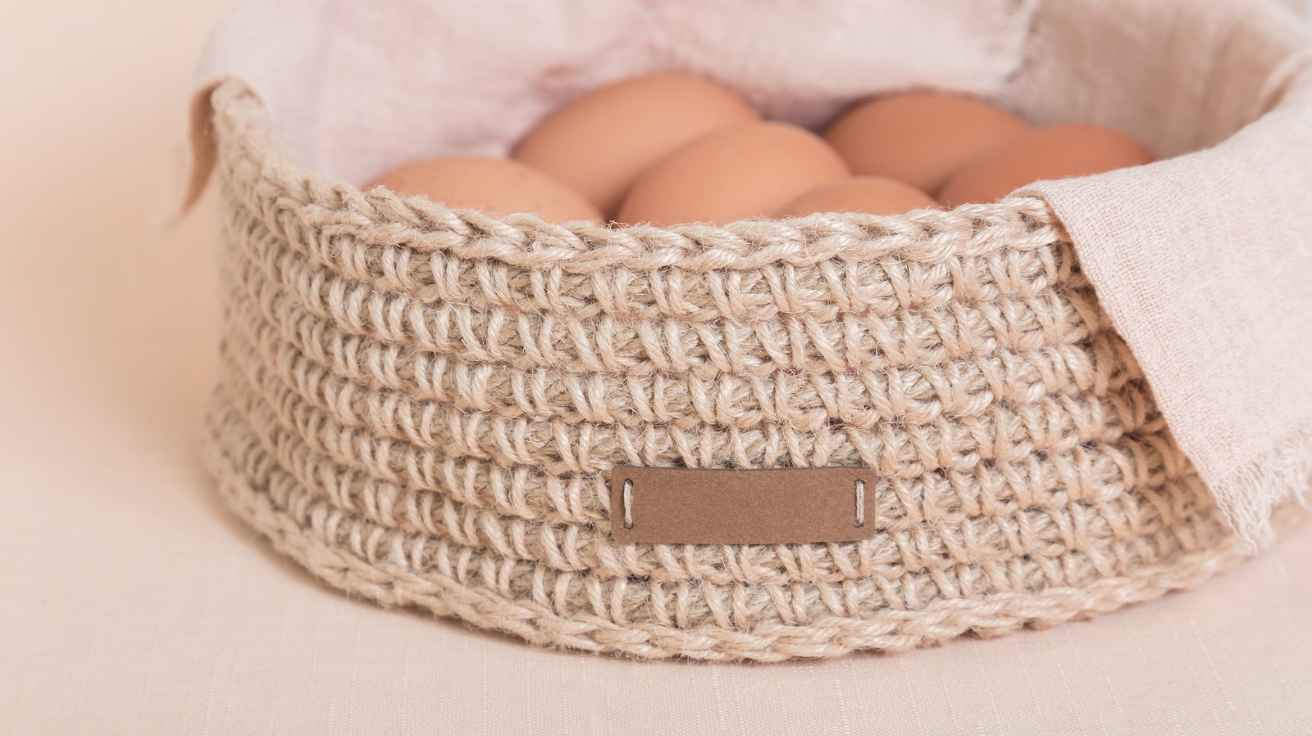
Crochet Storage Basket Tutorial: Easy Step-by-Step Guide
A clutter-free home feels more relaxing, but finding attractive storage that fits your space can be difficult. Instead of buying another plastic container, why not make something beautiful with yarn? This crochet storage basket tutorial will show you how to create a practical, handmade basket that looks lovely on shelves, desks, bathroom counters, and bedside tables.
You don’t need advanced crochet skills to get started. With a few basic stitches, the right yarn, and a little patience, you can make a basket that suits your favorite colors and your home’s style. I’ll walk you through choosing supplies, crocheting a flat base, building sturdy sides, adding optional handles, and finishing your project neatly.
Whether you want to organize yarn, store toys, hold bathroom essentials, or create a thoughtful handmade gift, this beginner-friendly project is easy to customize.
Why Make a Crochet Storage Basket?
A crochet storage basket combines everyday usefulness with the charm of handmade decor. Unlike many store-bought organizers, you can choose its exact size, color, texture, and shape.
Here are a few ways to use your finished basket:
- Living room: Store remote controls, magazines, small blankets, or knitting supplies.
- Bedroom: Organize accessories, chargers, hair products, or bedside essentials.
- Bathroom: Hold rolled washcloths, spare toiletries, and hair accessories.
- Craft room: Keep yarn balls, hooks, scissors, and unfinished projects together.
- Nursery or playroom: Store lightweight toys, blocks, and soft stuffed animals.
- Entryway: Collect keys, gloves, and other small everyday items.
A crochet basket also makes a thoughtful gift. Fill a small basket with skincare products, wrapped treats, or craft supplies for a personalized present.
One important detail: crochet fabric naturally has gaps between stitches. If you want your basket to hold its shape, use firm stitches, suitable yarn, and a base that is reinforced enough for the items you plan to store.
Materials You’ll Need for This Crochet Storage Basket Tutorial
Gather your supplies before you begin. You don’t need a large collection of tools, making this a budget-friendly crochet project.
| Material | Recommended choice | Purpose |
|---|---|---|
| Yarn | Cotton or sturdy cotton-blend yarn | Creates a durable basket |
| Crochet hook | 5–7 mm, according to the yarn label | Controls stitch size and fabric firmness |
| Scissors | Small, sharp scissors | Cuts the yarn |
| Yarn needle | Large-eye blunt needle | Weaves in loose ends |
| Stitch marker | Optional locking marker | Marks the beginning of each round |
| Measuring tape | Optional | Checks the basket’s dimensions |
Which yarn is best for a crochet basket?
Cotton yarn is an excellent starting choice because it creates defined stitches and generally holds up well to everyday use. A sturdy cotton blend can also work nicely.
Bulky yarn or several strands of suitable yarn held together can produce a thicker basket with fewer rounds. However, always use a hook appropriate for your yarn and comfortable for your hands.
Avoid very soft, loosely spun yarn if you want a firm-sided basket. For a decorative basket that needs extra structure, you can also crochet around a suitable cord, provided your hook can work through the resulting fabric.
Beginner tip: Choose a light or medium color for your first basket. It’s easier to see where each stitch begins and ends than it is with very dark yarn.
Crochet Storage Basket Tutorial: Step-by-Step Instructions
This project uses US crochet terminology and is worked in continuous or joined rounds, depending on your preference. The example below uses single crochet stitches for a compact fabric.
The finished size depends on your yarn, hook, tension, and the number of rounds you work. Treat the instructions as a flexible beginner pattern rather than a fixed-size commercial pattern.
Step 1: Create the base of your basket

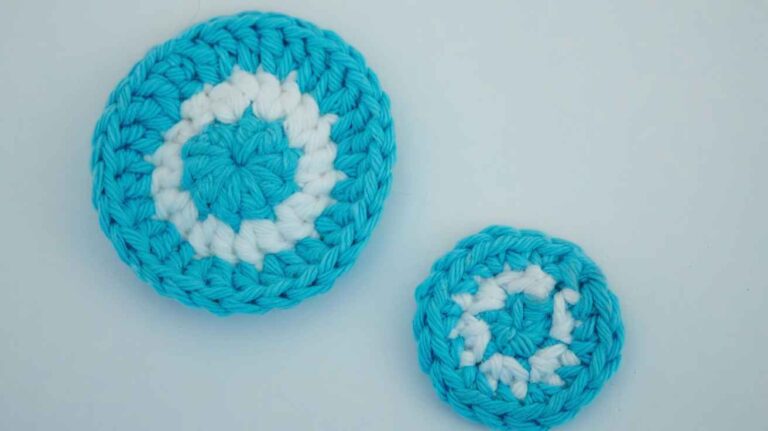
Start with a magic ring, or make a chain of four stitches and join it into a ring with a slip stitch.
Work six single crochet stitches into the ring. If you use a magic ring, pull the yarn tail to close the center tightly.
For the next round, increase by working two single crochet stitches into each stitch around. Continue increasing evenly in later rounds until the base reaches your desired width.
For example, a simple increase sequence might look like this:
- Round 1: 6 single crochet stitches.
- Round 2: 12 stitches, with two stitches in each stitch.
- Round 3: 18 stitches, increasing every second stitch.
- Round 4: 24 stitches, increasing every third stitch.
Keep increasing evenly as you work more rounds. The base should lie flat rather than curl into a bowl or develop wavy edges.
Helpful tip: If the base starts curling upward, you may need more increases. If it becomes ruffled, you may be adding too many. Adjust the stitch count before moving on.
Step 2: Build the sides of the basket

Once the base reaches the desired diameter, stop increasing. Work one round of single crochet through the back loop only. This creates a visible ridge that helps define the transition between the bottom and the sides.
For the following rounds, work one single crochet into each stitch around. Keep your tension consistent so the sides rise evenly.
Continue until the basket reaches your preferred height. A small desk basket may need only a few rounds, while a larger organizer will require more.
Count your stitches regularly. If your stitch count changes unexpectedly, the basket may begin to lean or become uneven.
Step 3: Add a second color (optional)
A color change is an easy way to make your crochet storage basket look more decorative. Try a neutral base with sage green sides, or use a contrasting color for the top edge.
To change colors neatly, begin the final yarn-over of the last stitch in the old color, then complete the stitch with the new color. Continue crocheting with the new yarn.
For a cleaner finish, avoid tying bulky knots where they may show on the outside. Weave both yarn tails securely into the stitches using a yarn needle.
You can change colors after a few rounds, create wide stripes, or use a different color only for the rim. If you’re a beginner, one simple color change is often enough to create a polished result.
Step 4: Make the basket sturdier

A basket that collapses when you pick it up can be frustrating. Fortunately, you can improve its structure without making the pattern complicated.
Try these techniques:
- Use a slightly smaller hook than you would for a loose, drapey project, while keeping your stitches comfortable to work.
- Choose firm cotton or a suitable bulky yarn.
- Keep each stitch consistent in size.
- Work additional rounds if the sides need more height.
- For extra structure, crochet around suitable cotton cord if your hook and yarn can accommodate it.
If you want a basket for heavier objects, test its stability before filling it. A handmade crochet basket is best suited to lightweight household storage unless you specifically design and reinforce it for greater loads.
Step 5: Add handles (optional)

Handles make a crochet storage basket easier to carry from room to room. They are particularly useful for craft supplies, toys, and small household items.
To create two simple handles, mark two matching positions on opposite sides of the basket. At each position, chain a small number of stitches, skip the same number of stitches on the basket rim, and continue crocheting into the next stitch.
On the following round, work into the chain spaces to reinforce the handles. For a sturdier finish, add another round around the rim and handle openings.
Keep both handles the same length and make sure they’re securely attached. If you prefer a clean, handle-free design, simply skip this step.
Step 6: Finish the rim and weave in the ends

A neat rim gives your basket a finished look. Once the basket reaches your preferred height, work a final round of slip stitches or single crochet stitches. Avoid pulling too tightly, as this can make the opening narrow.
Cut the yarn, leaving a tail long enough to weave in securely. Pull the tail through the final loop and use a yarn needle to hide it inside several stitches.
Check the base and sides for loose stitches. Gently shape the basket with your hands and place it on a flat surface to make sure it sits evenly.
Your crochet storage basket is now ready to use!
How to Make Your Crochet Storage Basket Fit Your Home
One of the best things about this crochet storage basket tutorial is how easily you can change the design. You can use the same basic method to create baskets for different rooms, storage needs, and decorating styles.


Choose the right basket size
Use these approximate dimensions as a starting point. Your final measurements will vary with your yarn and tension.
| Basket style | Approximate diameter | Best use |
|---|---|---|
| Small | 10–15 cm (4–6 in) | Jewelry, hair ties, desk supplies |
| Medium | 20–25 cm (8–10 in) | Yarn, toiletries, accessories |
| Large | 30–35 cm (12–14 in) | Toys, folded clothes, craft supplies |
To make a wider basket, continue increasing the base before working the sides. To make a taller basket, simply work more rounds without increasing.
For a rectangular basket, start with an oval or rectangular base and crochet evenly around its perimeter. The same general principle applies: create a flat foundation first, then build the walls.
Try these decorative styles


- Farmhouse style: Use cream, beige, or natural cotton yarn with a simple stitch pattern.
- Boho style: Combine earthy shades such as terracotta, olive, and sand.
- Modern minimalist: Choose one neutral color and a clean, straight-sided shape.
- Color-block design: Divide the basket into two or three contrasting color sections.
- Textured design: Add bobble stitches or another raised stitch pattern for visual interest.
Keep the stitch pattern simple if you want the basket to hold its shape. Decorative stitches can look beautiful, but a dense single crochet fabric is often the easier choice for a first project.
Common Mistakes to Avoid
Even a beginner-friendly crochet basket can develop a few problems. Catching them early saves time and helps you achieve a more professional result.
The base curls or becomes wavy
A curling base may need more increases, while a wavy base may have too many. Check your stitch count and adjust the next round rather than continuing with an uneven foundation.
The sides lean to one side
This often happens when you accidentally skip stitches, add extra stitches, or lose track of the beginning of a round. Use a stitch marker and count your stitches periodically.
The basket feels too floppy
Try a firmer yarn, a smaller compatible hook, or tighter and more consistent stitches. If the basket is intended for heavier items, consider adding a suitable structural element rather than relying on crochet fabric alone.
The top edge looks uneven
Check that the stitch count remains consistent and avoid pulling the final round too tightly. A final round of single crochet can help create a clean, defined edge.
A Practical Tip for a Better Crochet Storage Basket
Here’s a useful trick: test the base before you build the sides.
Place your crocheted base on a flat table after every few increase rounds. If it sits flat and has the diameter you want, you’re ready to start the walls. If it curls or ripples, correct the stitch count before continuing.
This small check can prevent an entire basket from becoming misshapen. It’s especially helpful when you use a new yarn, switch hook sizes, or crochet with a different tension than usual.
You can also make a small test swatch before starting. This helps you judge whether the fabric is dense enough to support the items you plan to store.
How to Care for Your Handmade Crochet Basket
With basic care, a crochet storage basket can remain useful and attractive for a long time.
- Remove dust regularly: Use a soft brush or vacuum attachment on a gentle setting.
- Clean carefully: Follow the yarn label’s washing instructions. If the yarn is washable, spot-cleaning is often a good starting point.
- Dry thoroughly: Reshape the basket and let it dry completely before returning items to it.
- Avoid excessive weight: Heavy objects can stretch the base and distort the sides.
- Store it properly: When not in use, empty the basket and keep it in a dry place.
If you plan to use your basket in a bathroom or kitchen, remember that repeated moisture can affect yarn and encourage mildew if the basket stays damp. Choose a suitable yarn and allow it to dry between uses.
Frequently Asked Questions
Is this crochet storage basket tutorial suitable for beginners?
Yes. This crochet storage basket tutorial uses basic stitches, including chain, slip stitch, single crochet, and increases. Beginners can practice making a flat base before working in rounds to build the sides.
What type of yarn is best for a crochet storage basket?
Cotton yarn and sturdy cotton blends are popular choices because they produce defined stitches and a relatively firm fabric. Bulky yarn can also work well for thicker baskets. Choose a yarn that suits your desired size, texture, and level of structure.
How do you make a crochet storage basket stand up?
Use firm yarn, a suitable hook, consistent tension, and dense stitches. A smaller compatible hook can help create a tighter fabric. You can also crochet around suitable cord or incorporate a compatible structural insert if the design requires extra support.
How long does it take to crochet a storage basket?
A small, simple basket may take a few hours, while a larger basket with handles or textured stitches may take longer. Your crochet speed, yarn thickness, and the complexity of your design will affect the total time.
Can I make a crochet storage basket without a magic ring?
Yes. Chain four stitches and join them with a slip stitch to form a ring. Work the first round of stitches into that ring, then continue with the base increases. This method is a useful alternative if you find the magic ring difficult.
Conclusion: Make Your Own Crochet Storage Basket
A handmade basket is a simple way to combine creativity and practical storage. With basic crochet stitches, sturdy yarn, and a little patience, you can create a useful organizer that matches your home and personal style.
This crochet storage basket tutorial gives you the foundation to experiment with different colors, sizes, textures, and handles. Start with a small, single-color basket, focus on keeping the base flat, and build the sides with consistent stitches.
Ready to get started? Gather your yarn and crochet hook, follow the steps above, and create a basket for your favorite corner of the home. Once you’ve mastered the basic design, try making a matching set in different sizes.