
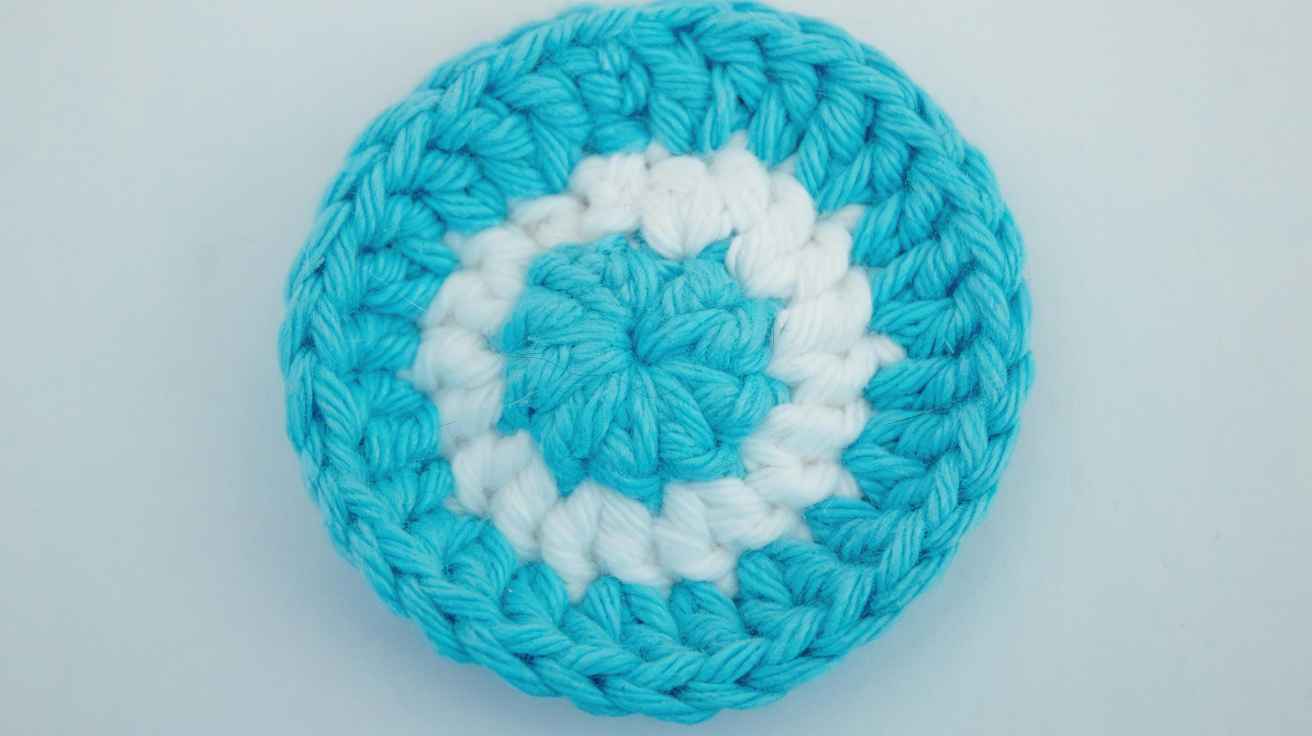
How to Make a Magic Circle in Crochet: Easy Guide
If you are learning crochet, one of the first techniques that can make your projects look much neater is the magic circle. Knowing how to make a magic circle in crochet gives you a clean, adjustable starting point for hats, amigurumi, flowers, granny circles, coasters, and many other projects.
The magic circle can seem confusing at first because your yarn moves around your fingers in an unfamiliar way. The good news is that once you understand where the yarn goes and where to insert your hook, it becomes a quick and useful technique.
In this beginner-friendly guide, I’ll walk you through how to make a magic circle in crochet step by step. You’ll also learn how to tighten it, how to crochet your first round into it, common mistakes to avoid, and an easier alternative if the magic circle feels frustrating.
What Is a Magic Circle in Crochet?
A magic circle, also called a magic ring or adjustable ring, is a crochet technique that creates a loop that can be tightened after you work stitches into it.
Unlike starting with a chain and joining the ends, a magic circle allows you to close the center completely. This is especially useful when you want a project without a noticeable hole in the middle.
A magic circle is commonly used for:
- Amigurumi
- Crochet flowers
- Round coasters
- Crochet baskets
- Hats and beanies
- Mandalas
- Granny-style circles
- Round motifs
- Crochet toys
- Circular blankets
The biggest advantage is the adjustable center. You can pull the yarn tail to make the opening smaller or completely closed.
How to Make a Magic Circle in Crochet
To make a magic circle, wrap the yarn around your fingers to form a loop, insert your crochet hook into the loop, pull up a strand of yarn, and secure the loop with a chain stitch. You can then work your first crochet stitches into the adjustable ring and pull the yarn tail to close the center.
The basic process is simple:
- Make a loop with your yarn.
- Insert the hook through the loop.
- Pull up a loop of working yarn.
- Secure the ring with a chain.
- Crochet your first stitches into the ring.
- Pull the yarn tail to tighten the center.
Now let’s go through each step more carefully.
What You Need Before You Start
You only need a few basic supplies to practice a magic circle.
| Supply | Beginner-friendly choice |
|---|---|
| Crochet hook | Size recommended on your yarn label |
| Yarn | Medium-weight yarn is easy to see |
| Scissors | Small sharp scissors |
| Tapestry needle | Useful for weaving in the yarn tail |
For your first attempts, choose a smooth, medium-weight yarn in a light or medium color. Very dark, fuzzy, slippery, or extremely thin yarn can make it harder to see the loops.
Your crochet hook should generally match the yarn recommendation, although the exact hook size will depend on the project.
Step 1: Make a Loop With the Yarn

Start by leaving a yarn tail that is around 4–6 inches long. You can leave a little more if you are worried about accidentally pulling the tail through the ring.
Hold the working yarn in your hand and wrap it around two fingers.
Create a loop where the working yarn crosses over the yarn tail. Keep the crossing point secure with your fingers.
At this stage, don’t worry if the loop does not look perfect. The important thing is keeping the yarn crossing in place.
Step 2: Insert Your Crochet Hook
Slide your crochet hook underneath the first strand of yarn and into the center of the loop.
Catch the working yarn with your hook.
Pull the working yarn through the loop.
You should now have a loop of yarn on your crochet hook while the larger adjustable loop remains underneath.
This is the part where beginners sometimes lose control of the ring. Keep holding the yarn crossing with your fingers until you have secured the loop.
Step 3: Secure the Magic Ring
With the loop on your hook, make one chain stitch.
To do this, yarn over and pull the yarn through the loop already on your hook.
The chain helps secure the ring so you can begin working stitches into the center.
Don’t pull the yarn tail tightly yet. The ring needs to remain open while you work your first stitches.
Step 4: Crochet Into the Center of the Ring
Now you can work your stitches into the magic circle.
For example, if a pattern says:
“6 single crochet into magic ring”
you will insert your hook into the large center opening, yarn over, pull up a loop, yarn over again, and pull through both loops on the hook.
Repeat this process until you have six single crochet stitches around the ring.
The important detail is that your hook should go through the center of the ring, underneath the strands forming the adjustable loop.
Step 5: Tighten the Magic Circle
Once your first round is complete, hold the stitches securely.
Find the yarn tail hanging from the center of the circle.
Gently pull the yarn tail.
The adjustable loop should begin shrinking.
Continue pulling until the center is as small as you need.
This is the feature that makes the magic circle so useful. Instead of being stuck with a permanent chain-2 or chain-4 opening, you can adjust the center after adding your stitches.
Step 6: Check Your First Round
Before moving on, look at the center of your crochet piece.
Ideally, the stitches should form a small, closed circle.
If you still see a large hole, don’t immediately assume you made the magic circle incorrectly. You may simply need to pull the yarn tail farther.
If the tail will not tighten the circle, stop and check whether the first stitches were worked around the correct strands of yarn.
How to Make a Magic Circle With Single Crochet
Single crochet is one of the easiest stitches to practice with a magic circle.
Try this beginner exercise:
- Make your magic circle.
- Chain 1 to secure it.
- Work 6 single crochet stitches into the ring.
- Hold the stitches with one hand.
- Pull the yarn tail gently.
- Close the center.
- Join the round if your pattern requires it.
You should end up with a small circular piece containing six stitches.
This simple exercise is excellent practice before starting a more complicated project such as amigurumi.
How to Make a Magic Circle With Double Crochet
You can also use a magic circle as the foundation for double crochet projects.
The basic technique is the same. The difference is the stitch you work into the ring.
For a double crochet, you typically:
- Yarn over.
- Insert the hook into the center of the ring.
- Yarn over and pull up a loop.
- Yarn over and pull through two loops.
- Yarn over again.
- Pull through the remaining two loops.
Repeat the double crochet around the ring according to your pattern.
This technique is particularly useful for circular motifs, flowers, mandalas, and granny-style designs.
The Best Way to Hold a Magic Circle
Your hand position can make a surprisingly big difference.
Try holding the yarn tail and working yarn between the fingers of your non-hook hand. Use your thumb and another finger to stabilize the crossing point.
Keep gentle tension on the working yarn.
Don’t squeeze the ring too tightly. If your fingers are constantly fighting the yarn, it becomes much harder to insert the hook.
A relaxed grip gives you more control.
Common Magic Circle Mistakes
Learning how to make a magic circle in crochet usually takes a few attempts. If yours keeps falling apart, one of these common problems may be responsible.
Pulling the Tail Too Early
Don’t tighten the magic circle before you have worked the required stitches.
If you pull the tail too soon, the center becomes too small and it can be difficult to insert your hook.
Keep the ring open until your first round is finished.
Losing the Yarn Crossing
The crossing point holds the ring together while you start crocheting.
If you let go too soon, the loop may unravel.
Keep your fingers over the crossing point until the first chain and a few stitches are secure.
Crocheting Around Only One Strand
When you work stitches into the magic circle, make sure your hook catches the appropriate strands of the ring.
If you accidentally crochet around only one strand, the structure may not tighten correctly.
Using Very Slippery Yarn
Some yarns are much harder to control than others.
If you are learning, start with a smooth yarn that has enough texture to stay in place.
Once you are comfortable, you can experiment with cotton, acrylic, wool blends, and other fibers.
Making the Starting Tail Too Short
A very short tail can make tightening and securing the ring more difficult.
Leaving approximately 4–6 inches gives you enough yarn to work with and weave in later.
Magic Circle vs. Chain Method
You don’t always have to use a magic circle.
A traditional alternative is to chain several stitches, join them into a ring, and crochet into the center.
For example, a pattern might tell you to chain 4 and slip stitch into the first chain to form a ring.
Here’s the main difference:
| Magic Circle | Chain Ring |
|---|---|
| Adjustable center | Fixed center |
| Can close the center tightly | Usually leaves a small opening |
| Excellent for amigurumi | Easy beginner alternative |
| Useful for circular designs | Simple for many flat motifs |
| Takes practice | Often easier to understand initially |
Neither method is automatically right for every project. Follow the technique specified by your pattern when possible.
An Easier Alternative to the Magic Circle
If you are struggling with the magic circle, don’t give up on the project.
The chain-ring method is a perfectly useful alternative for many crochet patterns.
Try this:
- Chain 2–4 stitches, depending on the pattern.
- Insert your hook into the first chain.
- Make a slip stitch to form a ring.
- Crochet the first round into the center.
- Continue according to the pattern.
The center may remain slightly open, but this may not matter for a particular design.
For amigurumi, however, a tightly closed magic ring is usually preferred because stuffing can show through a larger opening.
How to Keep a Magic Circle From Unraveling
A magic circle can loosen if the yarn tail isn’t secured properly.
After tightening the ring, continue crocheting according to your pattern. When you’re finished, use a tapestry needle to weave the tail securely through several stitches on the back of the project.
For extra security, weave the tail in one direction and then change direction through nearby stitches.
Don’t simply cut the tail immediately after tightening the circle. The tail needs to be properly secured.
A Useful Trick for Beginners
Here’s a simple trick that makes learning the magic circle much easier: practice the motion without worrying about making a perfect circle.
Make the ring, crochet six stitches into it, and tighten it.
Then undo it and repeat.
Do this several times with the same yarn.
You’re training your hands to remember the movement. After a few repetitions, wrapping the yarn and inserting the hook becomes much more natural.
This is often more effective than watching the same tutorial repeatedly without actually practicing.
How Many Stitches Should Go in a Magic Circle?
The number of stitches depends entirely on your crochet pattern.
Some common starting rounds include:
- 4 single crochet
- 5 single crochet
- 6 single crochet
- 8 single crochet
- 10 or more double crochet
- A specific number of stitches for a crochet motif
Never choose the number randomly if you’re following a pattern.
The designer chooses the starting stitch count based on the shape and stitch used in the project.
For amigurumi, for example, six single crochet stitches are a very common starting point, followed by increases in later rounds.
Why Does My Magic Circle Have a Hole?
A magic circle may still have a small hole for several reasons.
First, the yarn tail may not have been pulled tightly enough. Hold the crochet stitches firmly and pull the tail gradually.
Second, your stitches may have been worked incorrectly around the ring.
Third, some yarns naturally resist tightening because of their construction or texture.
If you are making stuffed crochet toys, check the center before adding stuffing. A tightly closed center helps prevent stuffing from becoming visible.
Why Does My Magic Circle Keep Coming Undone?
If the ring opens after you tighten it, the yarn tail may not be secured properly.
After closing the center, weave the tail through several stitches on the back of your work.
For projects that receive a lot of handling, such as amigurumi and toys, take extra care when finishing the tail.
A properly woven-in tail is much less likely to loosen during use.
What Can You Make With a Magic Circle?
Once you know how to make a magic circle in crochet, you can use the technique in dozens of projects.
Some ideas include:
Crochet Amigurumi
Magic circles are widely used to begin crochet animals, dolls, fruits, characters, and other stuffed shapes.
Crochet Hats
Many top-down hats begin with a small circular center and expand through carefully planned increases.
Crochet Flowers
A magic ring can create a compact center for petals and floral motifs.
Crochet Coasters
Circular coasters can start with a magic circle and grow outward through several rounds.
Crochet Mandalas
Colorful circular designs often use a ring as the foundation for multiple rounds of stitches.
Crochet Baskets
Small round baskets can begin with a magic circle before the sides are built upward.
Frequently Asked Questions
How do you make a magic circle in crochet for beginners?
Make a loop with the yarn, insert your crochet hook into the loop, pull up the working yarn, and make a chain to secure it. Crochet the required stitches into the ring, then pull the yarn tail to close the center.
Is a magic circle the same as a magic ring?
Yes. “Magic circle,” “magic ring,” and “adjustable ring” are commonly used for the same basic crochet technique. Different designers may use different terms in their patterns.
Why won’t my magic circle tighten?
Your stitches may not be worked around the correct part of the ring, or the yarn tail may have become trapped. Make sure the tail can move freely and pull it gently after completing the first round.
Can I use a chain instead of a magic circle?
Yes. A chain ring can replace a magic circle in many patterns, although it usually leaves a small center opening. Check your specific pattern before substituting the technique.
What is the easiest yarn for learning a magic circle?
Smooth, medium-weight yarn is usually easier for beginners because the individual strands and loops are easier to see. Very fuzzy, thin, or slippery yarn can make the technique harder to learn.
Conclusion
Learning how to make a magic circle in crochet is one of those skills that feels awkward for the first few attempts and then suddenly becomes second nature.
The key is to remember the sequence: make the loop, secure it, crochet into the center, and pull the tail to close the ring.
Start with a simple six-single-crochet practice round. Once your hands become comfortable with the movement, you’ll be able to use magic circles for amigurumi, flowers, hats, coasters, mandalas, and many other circular crochet projects.
Ready to practice? Grab your favorite yarn and hook, make a few magic circles, and repeat the process until your hands remember the motion.
FAQ Section
How do you make a magic circle in crochet?
Create an adjustable yarn loop, insert the hook into the loop, pull up the working yarn, secure it with a chain, crochet the required stitches into the ring, and pull the yarn tail to close the center.
What is the difference between a magic circle and a chain ring?
A magic circle has an adjustable center that can be pulled closed. A chain ring is made by joining chains together and generally leaves a fixed opening in the middle.
How many stitches go into a crochet magic circle?
There is no universal number. The required stitch count depends on the crochet pattern and the stitch being used. Six single crochet stitches are a common starting point for many amigurumi patterns.
Why does my crochet magic circle keep unraveling?
The starting tail may not be secured properly, or the first stitches may not have captured the ring correctly. After tightening the center, weave the yarn tail securely through several stitches on the back.
Can beginners learn how to make a magic circle in crochet?
Yes. The technique can take several attempts to master, but it becomes much easier with practice. Smooth, medium-weight yarn is a good choice when learning.


One Comment