Slip Stitch Tutorial for Beginners: Easy Step by Step Guide
If you are learning crochet, the slip stitch tutorial for beginners is one of the easiest lessons to start with. A slip stitch is small, simple, and incredibly useful. You can use it to join crochet rounds, move your yarn without adding height, finish projects neatly, and create decorative details.
The best part? You only need a crochet hook and yarn to practice.
At first, the slip stitch can feel slightly confusing because it looks different from taller crochet stitches. Once you understand where to insert your hook and how to pull the yarn through, though, the movement becomes quick and natural.
In this guide, I’ll show you exactly how to make a crochet slip stitch, explain where to use it, cover common mistakes, and share a simple practice method that can help beginners build confidence.
What Is a Slip Stitch in Crochet?
A slip stitch is a short crochet stitch that creates very little height. Unlike a single crochet or double crochet, it does not build up a new row very much.
The basic slip stitch technique involves inserting your hook into a stitch, yarn over, and pulling the yarn through both the stitch and the loop already on your hook.
Because it is so short, the slip stitch is commonly used for:
- Joining the beginning and end of a crochet round
- Moving across stitches without adding height
- Finishing crochet edges
- Joining crochet pieces
- Creating decorative lines
- Closing amigurumi pieces
- Working certain crochet patterns
- Making neat borders
One important thing to remember is that a slip stitch is usually not counted as a regular stitch unless the pattern specifically tells you to count it.
Slip Stitch Tutorial for Beginners: Step-by-Step
If you are completely new to crochet, don’t worry about making the stitch quickly. Focus on the movement first.
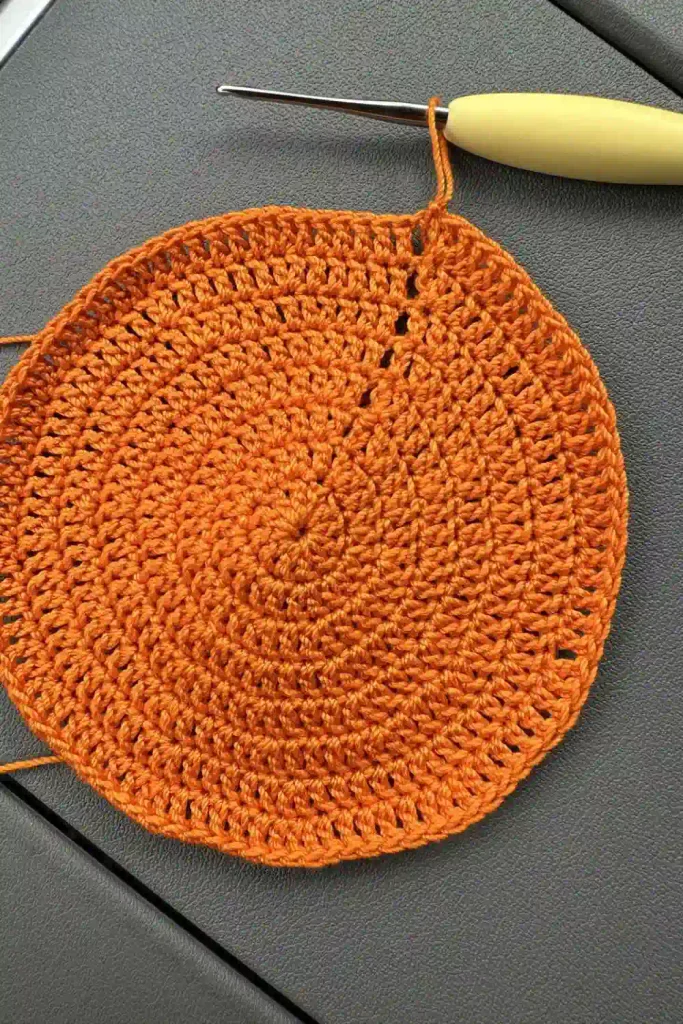
Step 1: Make a Starting Loop
Start with your yarn and crochet hook. Make a slip knot and place it on the hook.
The loop should sit comfortably on your hook. It should not be pulled extremely tight because you need enough space to move the hook through the stitch.
Step 2: Insert the Hook
Insert your crochet hook into the stitch where you want to make the slip stitch.
For practice, you can insert the hook into a chain stitch. Later, you can practice working slip stitches into single crochet or other stitches.
Make sure you insert the hook through the correct part of the stitch.
Step 3: Yarn Over
Wrap your working yarn around the hook from back to front.
This creates the loop of yarn that you will pull through the stitch.
Step 4: Pull the Yarn Through
Use your hook to pull the yarn through the stitch.
You will now have the new loop on your hook.
Step 5: Pull Through the Loop
Continue pulling that same loop through the loop that was already on your hook.
That’s it!
You have completed one slip stitch.
The entire movement can eventually become one smooth motion: insert the hook, yarn over, pull through the stitch, and continue pulling through the loop on the hook.
How to Do a Slip Stitch in Crochet
A simple way to remember the process is:
- Insert your hook into the desired stitch.
- Yarn over.
- Pull the yarn through the stitch.
- Pull the same loop through the loop on your hook.
A completed slip stitch should be short and fairly flat.
If your stitch looks unusually tall, you may accidentally be making another type of crochet stitch or pulling extra yarn through.
What Does a Slip Stitch Look Like?
A slip stitch usually looks like a small horizontal or slightly raised strand of yarn. Because it has almost no height, a row of slip stitches can create a neat, firm edge.
The appearance can change depending on your yarn, hook size, tension, and the location where you insert the hook.
Don’t worry if your first few stitches don’t look perfectly even. Consistent tension usually improves naturally with practice.
How to Slip Stitch to Join a Crochet Round
One of the most common uses for a slip stitch is joining crochet rounds.
Suppose you have finished crocheting around a circle and your pattern says, “slip stitch to join.”
You normally insert your hook into the designated joining stitch, yarn over, and pull the yarn through the stitch and the loop on your hook.
This closes the round without adding the height of another crochet stitch.
Why Use a Slip Stitch to Join?
A slip stitch keeps the join relatively short and helps prevent the next round from becoming unnecessarily tall.
This is especially useful for projects such as:
- Crochet hats
- Granny squares
- Crochet baskets
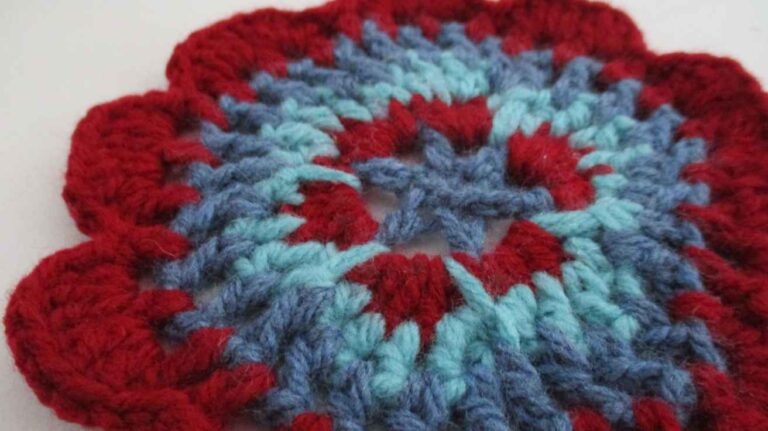
- Coasters
- Round blankets
- Amigurumi
- Crochet bags
The exact joining method can vary between patterns, so always follow the designer’s instructions when they specify a particular joining technique.
Slip Stitch vs. Single Crochet
Beginners often confuse slip stitches with single crochet because both can look small.
The main difference is height.
| Feature | Slip Stitch | Single Crochet |
|---|---|---|
| Height | Very short | Taller |
| Yarn over | Usually one | Usually one |
| Loops pulled through | Through stitch and loop on hook | Through stitch first, then two loops |
| Common use | Joining and edging | Building fabric |
| Fabric height | Minimal | Noticeable |
A single crochet creates a new stitch with visible height. A slip stitch mainly moves or joins the yarn without significantly increasing the height of your work.
When Should You Use a Slip Stitch?
There isn’t just one reason to learn this stitch. It has several practical uses.
Joining Crochet Rounds
This is probably the use beginners encounter most often.
A slip stitch can connect the final stitch of a round to the beginning of the round.
Creating Crochet Edges
Slip stitches can make a neat border around certain crochet projects.
They can be especially useful when you want an edge that does not add much bulk.
Moving Across a Row
Sometimes a crochet pattern tells you to slip stitch across several stitches.
This allows you to move your working position without creating a tall stitch.
Joining Crochet Pieces
Slip stitches can be used to connect individual crochet pieces. Depending on the pattern, the resulting seam can be subtle or decorative.
Adding Surface Decoration
Slip stitches can also be worked on the surface of crochet fabric to create lines, shapes, lettering, or other decorative effects.
This technique can make a simple project look much more detailed without using complicated stitches.
How to Practice Slip Stitch Crochet
The easiest way to practice is to make a small chain.
Start by crocheting approximately 15–20 chain stitches. Then practice inserting your hook into the chain and making slip stitches across it.
Don’t worry about making a finished project.
Your goal is to become comfortable with:
- Finding the correct stitch
- Inserting the hook
- Controlling yarn tension
- Pulling the yarn through smoothly
- Keeping your loops loose enough to work
- Recognizing the finished stitch
After practicing several rows, try making slip stitches into a row of single crochet stitches.
A Useful Beginner Practice Trick
Here is an easy trick that many beginners overlook: practice the movement with deliberately loose tension first.
Tight tension can make the slip stitch frustrating because your hook has very little room to move. Once you can make the stitch comfortably, gradually tighten your tension until you find a natural grip.
Your goal is not to make the smallest possible slip stitch. Your goal is to make a consistent stitch without fighting the yarn.
Common Slip Stitch Mistakes
Even though the slip stitch is simple, beginners commonly run into a few problems.
Pulling the Stitch Too Tight
This is probably the most common problem.
If you pull the yarn tightly after every slip stitch, your fabric can become stiff and difficult to work into.
Keep the loop on your hook relaxed.
Inserting the Hook Into the Wrong Place
Crochet stitches can be difficult to see when you’re starting out.
If your pattern tells you to work into the next stitch, take a moment to identify the top “V” of the stitch before inserting your hook.
Accidentally Adding Height
A slip stitch should not create significant height.
If your work starts growing much faster than expected, check that you are not accidentally working a single crochet or another stitch.
Skipping Stitches
Because slip stitches are small, they can be difficult to see.
Count your stitches when practicing. If you are supposed to work one slip stitch into every stitch and you end up with fewer stitches, you may have accidentally skipped one.
Using a Hook That Is Too Small
A very small hook can make tight slip stitches difficult, especially with thicker yarn.
For practice, use a comfortable hook and medium-weight yarn so you can clearly see what you are doing.
How to Make Slip Stitches Neater
Once you understand the basic technique, a few small changes can make your work cleaner.
Keep Your Tension Consistent
Try not to alternate between very tight and very loose stitches.
Consistent tension produces a more even edge.
Don’t Rush the Pull-Through
If your hook keeps catching on the yarn, slow down.
The hook should move smoothly through the stitch rather than being forced through it.
Use the Right Hook for Your Yarn
The recommended hook size on your yarn label is a useful starting point.
For learning, choose yarn that is easy to see and not extremely fuzzy. Smooth medium-weight yarn is often easier for beginners than very thin, dark, or textured yarn.
What Is a Slip Stitch Used for in Crochet?
A slip stitch is mainly used when you want to connect, move, finish, or decorate your crochet work without adding much height.
Some of its most common uses include:
- Joining rounds
- Joining chain loops
- Creating borders
- Closing crochet pieces
- Moving the hook to another location
- Sewing-like decorative crochet
- Joining granny squares
- Adding surface designs
This makes the slip stitch one of those basic crochet skills that you may use repeatedly even after you become an experienced crocheter.
Can You Slip Stitch Into a Chain?
Yes. You can work a slip stitch into a chain.
Insert your hook into the appropriate chain stitch, yarn over, and pull the yarn through the chain and the loop on your hook.
Slip stitching into chains is useful when joining a chain into a ring or creating certain crochet shapes.
However, always check your pattern because some patterns instruct you to insert your hook into a specific loop of the chain.
Can You Slip Stitch Without Turning?
Yes. Slip stitches can be worked without turning your project, depending on the pattern.
For example, when working around a crochet circle, you may continue around the project and use a slip stitch to join the round.
When working rows, however, your pattern may instruct you to turn after completing a row.
The pattern instructions should determine whether you turn your work.
How Tight Should a Slip Stitch Be?
A slip stitch should generally be firm enough to look neat but loose enough that it does not distort your fabric.
A useful test is simple: if you struggle to insert your hook into the next stitch because your previous slip stitch is extremely tight, loosen your tension.
This is particularly important when a later round or row needs to be worked into the slip-stitched area.
A Simple Slip Stitch Practice Exercise
If you want to master this stitch quickly, try this five-minute exercise.
First, make a chain of 20 stitches.
Next, work a slip stitch into each chain across the row. Then repeat the process several times.
After that, make another chain and practice working slip stitches into the back loops.
Finally, create a small circle and practice joining it with a slip stitch. This gives your hands experience with both straight and circular crochet.
A Beginner Insight: Learn to Recognize the Stitch, Not Just the Steps
One of the most useful things I recommend to new crocheters is learning to recognize what a stitch looks like after it is finished.
Memorizing “insert, yarn over, pull through” is helpful, but crochet becomes much easier when you can look at your work and identify the stitch visually.
With slip stitches, look for the short, flat structure rather than expecting it to resemble a tall crochet stitch.
Once you can recognize the stitch, counting rows, finding missed stitches, and following patterns becomes much easier.
Slip Stitch Abbreviations in Crochet Patterns
Most crochet patterns use abbreviations to save space.
The common abbreviation for slip stitch is:
sl st
You may see instructions such as:
“Sl st in next stitch.”
This means you should make one slip stitch in the next stitch.
You may also see:
“Join with a sl st.”
This usually means you should use a slip stitch to connect your current position with another specified stitch.
Always check the abbreviation guide included with a pattern because individual designers can occasionally use different terminology.
US and UK Crochet Terminology
If you are following patterns from different countries, terminology can sometimes be confusing.
Fortunately, slip stitch is generally referred to as a slip stitch in both US and UK crochet terminology.
The abbreviation may still vary by designer, so check the pattern notes before starting.
This is different from stitches such as single crochet and double crochet, where US and UK terminology can refer to different stitches.
FAQ: Slip Stitch Tutorial for Beginners
What is the easiest way to do a slip stitch in crochet?
The easiest method is to insert your hook into the desired stitch, yarn over, pull the yarn through the stitch, and then pull that same loop through the loop already on your hook. Keep your tension relaxed while practicing.
What is a slip stitch used for in crochet?
A slip stitch is commonly used to join crochet rounds, move across stitches without adding height, finish edges, connect crochet pieces, and create decorative surface designs.
Is a slip stitch the same as a single crochet?
No. A slip stitch is much shorter and does not create the same amount of height as a single crochet. A single crochet builds the fabric, while a slip stitch is often used for joining, moving, or finishing.
Why are my slip stitches so tight?
Slip stitches often become tight when the crocheter pulls the yarn too firmly. Try keeping the loop on your hook slightly relaxed and use a hook that moves comfortably through the stitch.
Can beginners learn slip stitch crochet?
Absolutely. Slip stitch is one of the simplest crochet techniques to learn. Beginners can practice it with a short chain before using it to join rounds, create edges, or connect crochet pieces.
Conclusion
Learning the slip stitch is a small step that opens up many possibilities in crochet. Once you understand the basic movement, you can use it for joining rounds, creating neat edges, moving across stitches, connecting pieces, and adding decorative details.
The key is to avoid making your stitches too tight. Practice slowly with a short chain, focus on consistent tension, and learn to recognize the finished stitch.
If you’re building your crochet skills one stitch at a time, save this slip stitch tutorial for beginners and practice it until the movement feels natural. Then try using your new skill on a simple crochet coaster, granny square, or small round project.
Happy crocheting!


One Comment